Jupyterlab dask mesocentre IPSL
L'environnement est basé sur ceux définis pour Zero to jupyterhub.
- base-notebook
- minimal-notebook
- scipy-notebook
Plus l'ajout des modules:
- netCDF4
- xarray
- extension git pour jupyterlab
Création de l'environnement
Chargement des modules
module load git/2.7.4
module load python/3.6-anaconda50
Installation des packages
Télécharger le fichier d'environnement YAML disponible ici.
conda env create -n nom_env -f environment.yaml
Construction des extensions jupyter lab
  conda activate nom_env
  jupyter labextension install @jupyter-widgets/jupyterlab-manager@^2.0.0 --no-build && \
  jupyter labextension install @bokeh/jupyter_bokeh@^2.0.0 --no-build && \
  jupyter labextension install jupyter-matplotlib@^0.7.2 --no-build && \
  jupyter labextension install @jupyterlab/git --no-build && \
  jupyter lab build -y
Run Jupyter Lab
Step 1: on ciclad2 or loholt2, open a Jupyter Lab session
-
Load environment
module load git/2.7.4 module load python/3.6-anaconda50 #conda activate <env_name> # uncomment if you want to use your own environment, replace <env_name> with the name of your environment -
Launch Jupyter Lab (e.g. on loholt2). An URL should be displayed
jupyter lab --ip loholt2.ipsl.polytechnique.fr --no-browser
Step 2: connect from outside
-
Configure FoxyProxy (see here).
-
Create a SOCKS proxy server with SSH. Replace
<your_login>by your own login.ssh -D 1080 <your_login>@loholt2.ipsl.polytechnique.frWarning
Port number must be the same as the one configured in FoxyProxy. You can use the port number you want between 1024 and 65535 (both included), as long as you keep the same when configuring FoxyProxy and creating a SOCKS proxy server. Here we used
1080. -
In the web browser you configured with FoxyProxy, copy/paste the URL displayed when launching Jupyter Lab.
Configure FoxyProxy
-
In Firefox or Chrome, install the FoxyProxy extension (here for Firefox and here for Chrome)
Warning
We show here an example on Firefox for the Jean Zay Jupyter Lab/Notebook, but it is the same principle for Chrome. For other place of connection, change the parameters with those indicating in the following tables.
-
Click on the extension's icon then
Options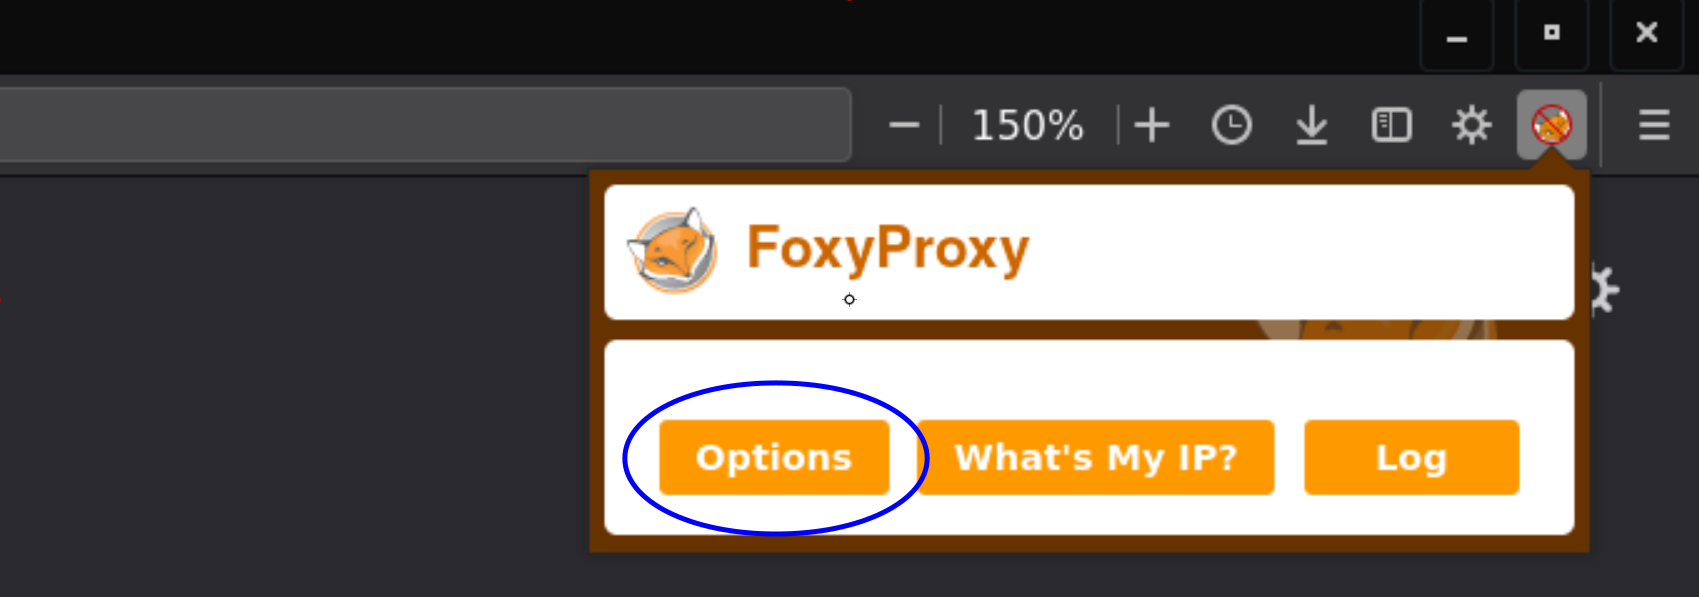
-
Click on
Add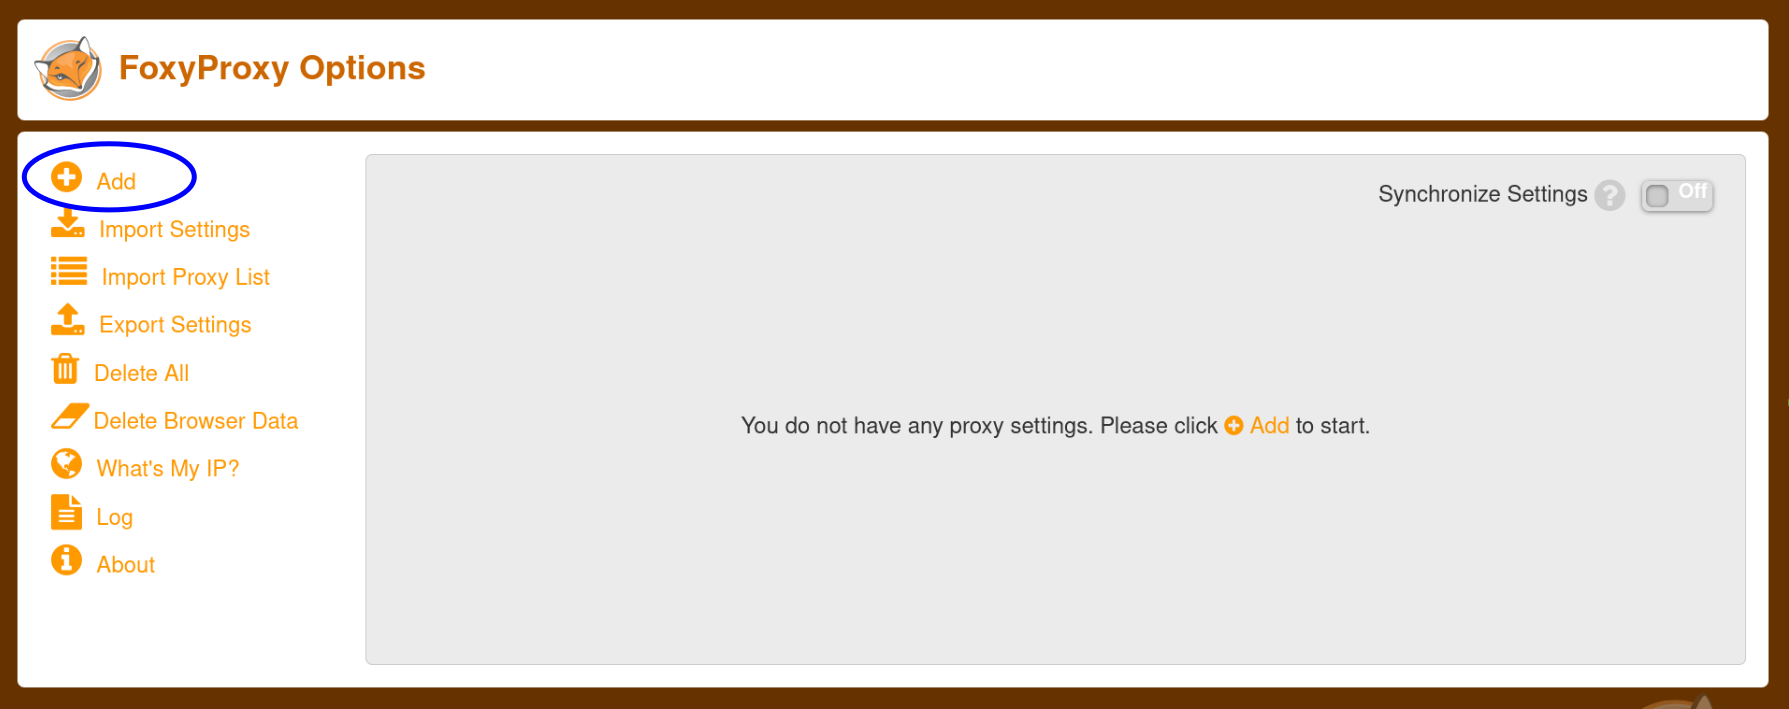
-
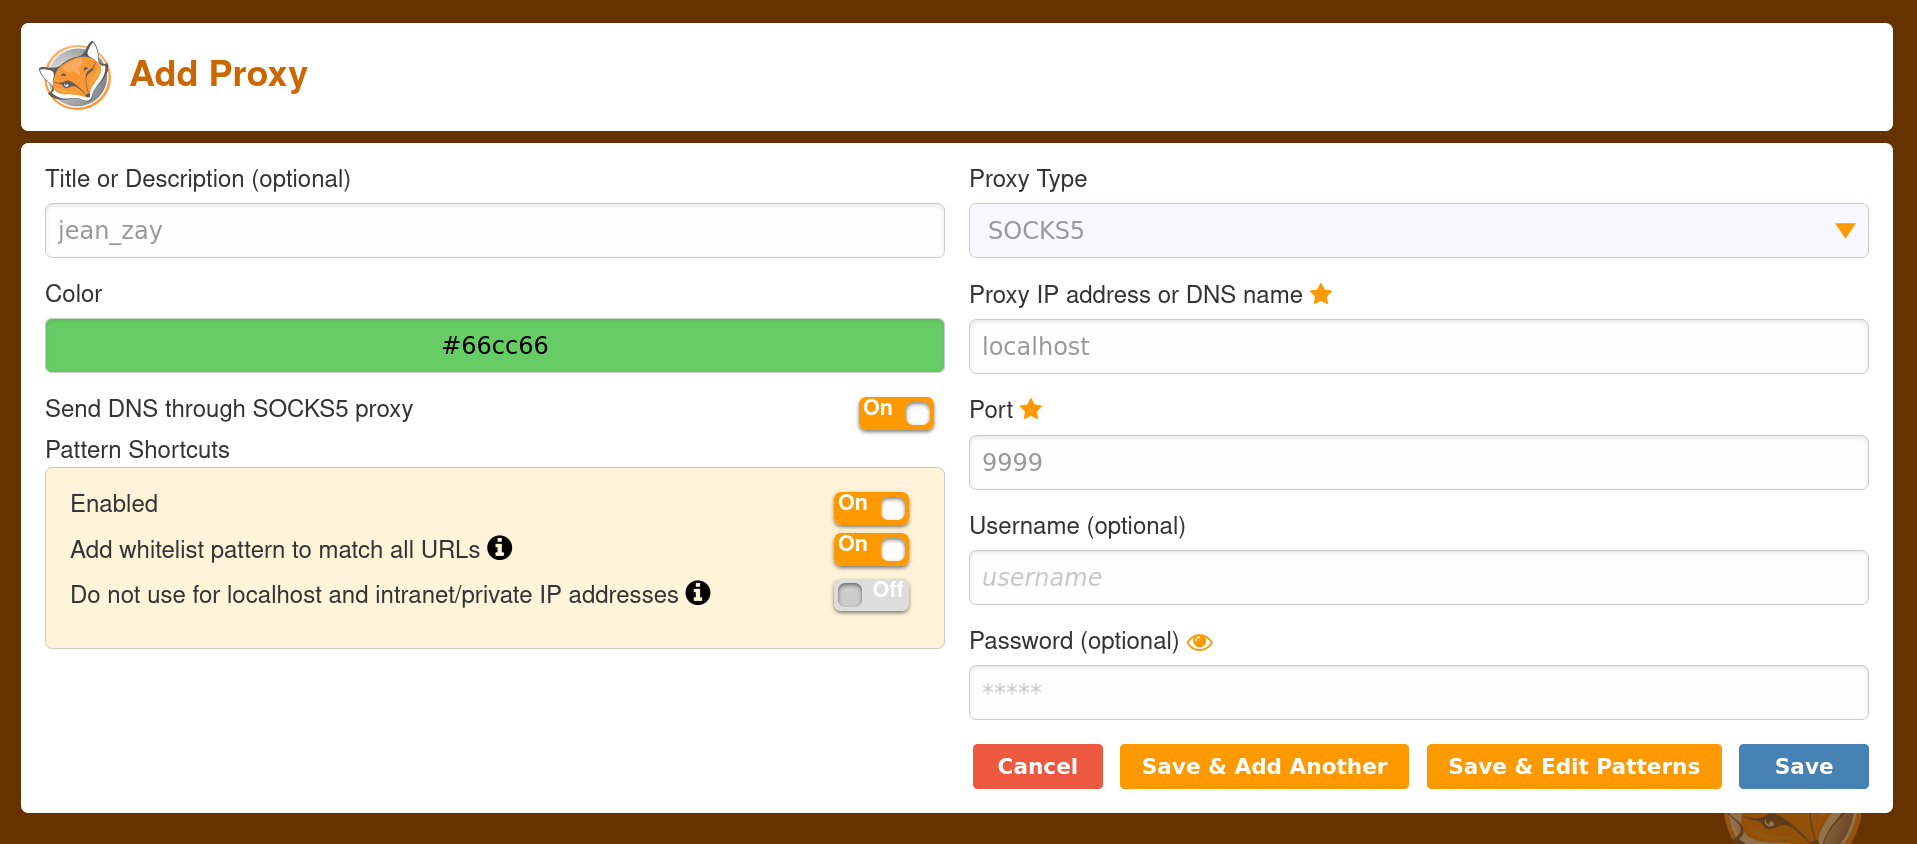
Define, depending on where you want to connect:
Title or Description Proxy Type Proxy IP address or DNS name Port loholt2 Jupyter Lab loholt2 SOCKS5 localhost 1080 Jean Zay Jupyter Lab/Notebook jean_zay SOCKS5 localhost 9999 Warning
You can use the port number you want between 1024 and 65535 (both included), as long as you keep the same number in the potential following commands (e.g. create a SOCKS proxy server with SSH).
Example for Jean Zay Jupyter Lab/Notebook:
-
Click on
Save & Edit Patterns
-
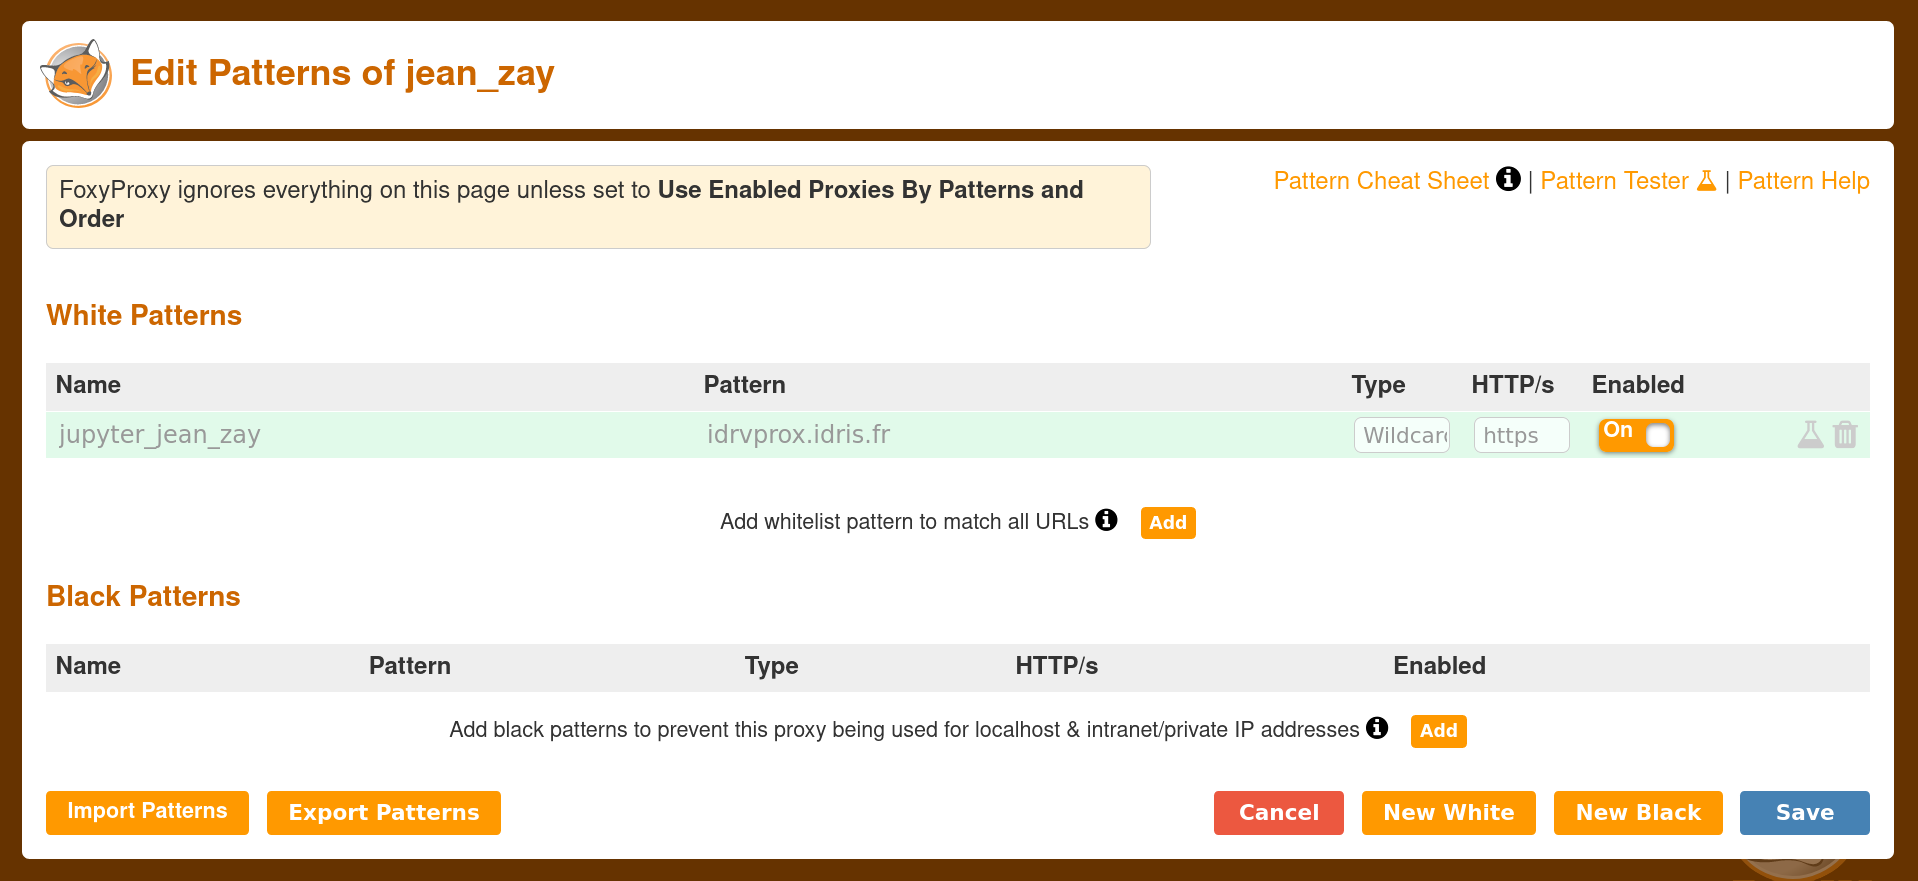
Define in the
White Patternssection, depending on where you want to connect:Name Pattern Type HTTP/s Enabled loholt2 Jupyter Lab jupyter_loholt2 loholt2.ipsl.polytechnique.fr* Wildcard all On Jean Zay Jupyter Lab/Notebook jupyter_jean_zay idrvprox.idris.fr Wildcard https On Info
Configuring this white pattern will allow the use of this proxy only for URLs matching the given pattern (see more information here).
Example for Jean Zay Jupyter Lab/Notebook:
-
Click on
Save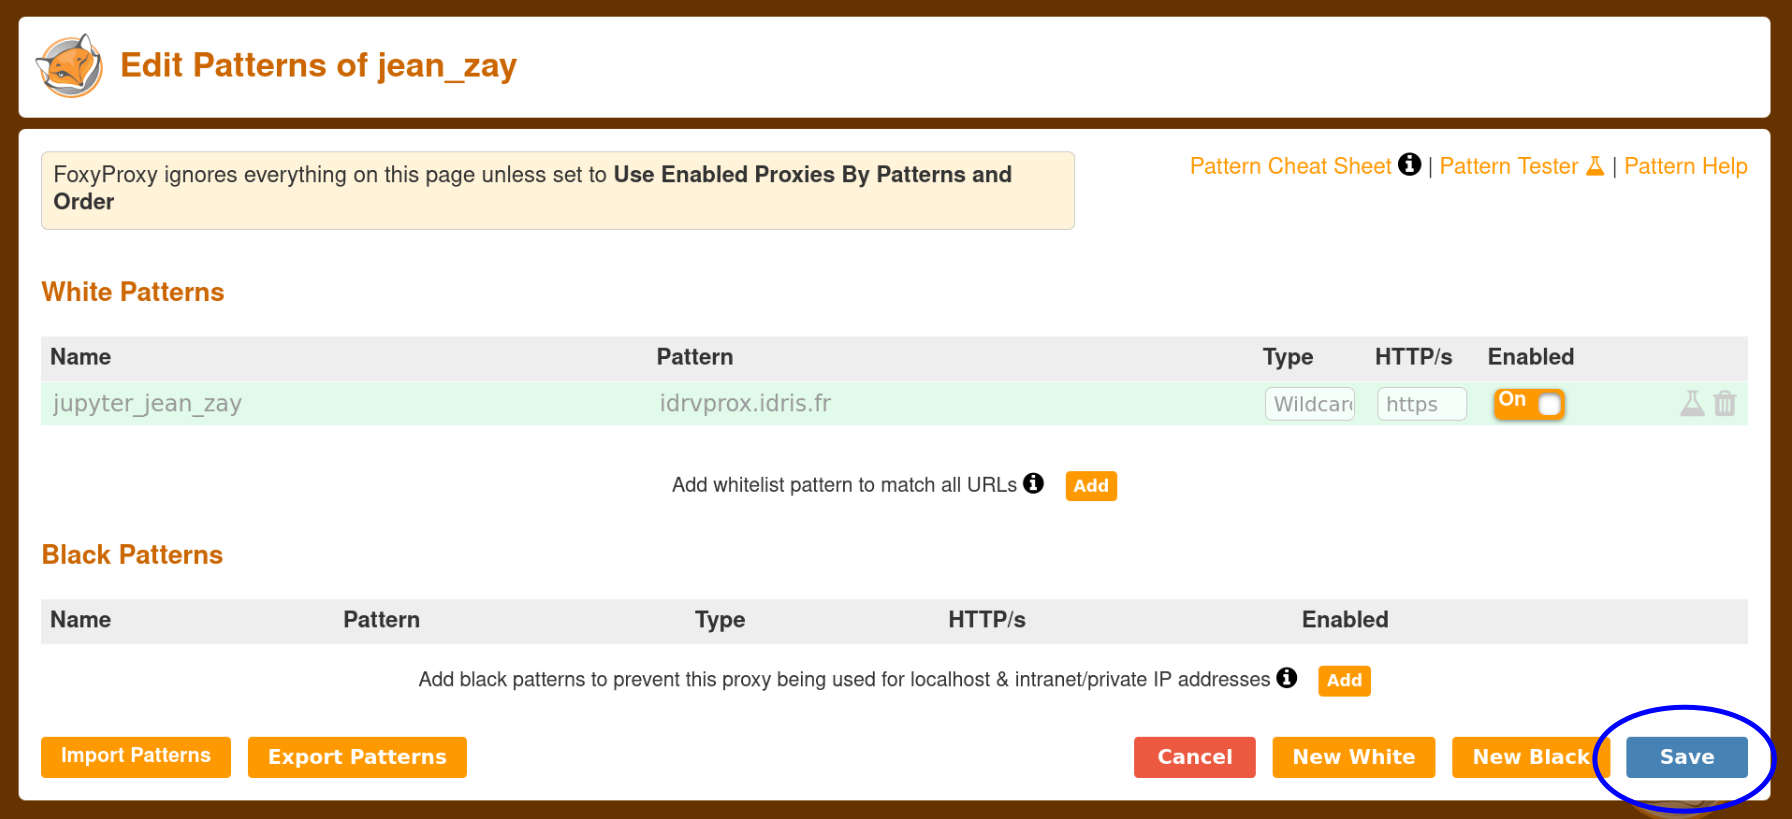
-
In the web browser where you installed FoxyProxy, click on the FoxyProxy icon and choose
Use Enabled Proxies By Patterns and Orders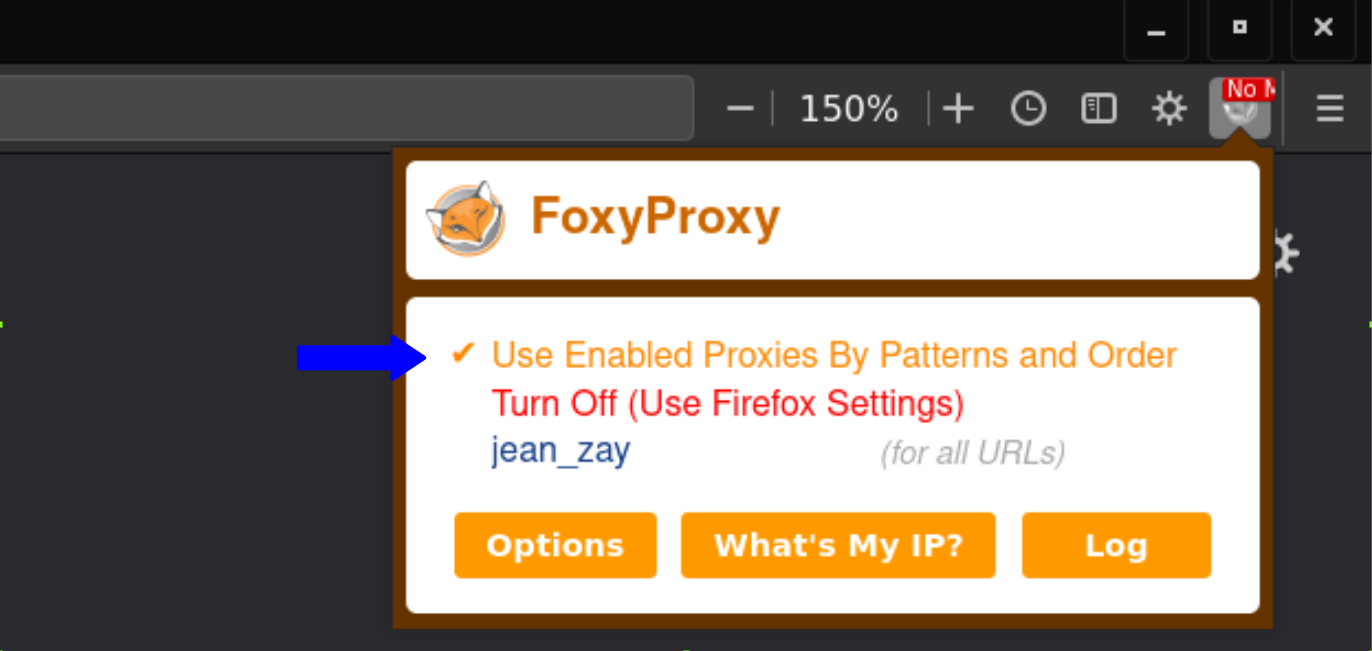
Info
When the FoxyProxy browser extension is set to
Use Enabled Proxies By Patterns and Orders, each configured proxy will be used for URLs that match their configured patterns (see more information here).Info
You can turn off FoxyProxy whenever you wish to by clicking on the FoxyProxy icon and choose
Turn Off.