JupyterHub
JupyterLab is a web-based interactive development environment for jupyter notebooks, code and data.
Jupyter Notebook is a web-based interactive computational environment. It allows to create notebooks containing code, text, visualizations. It is language agnostic and is compatible with more than 40 programming languages depending on kernels installed.
JupyterHub is a cloud plateform that can run instances of Jupyterlab or Jupyter notebooks.
Access
One jupyter per IPSL cluster is available.
- users of spirit: https://jupyter-su.ipsl.fr/spirit/.
- users of spiritx: https://jupyter-x.ipsl.fr/spiritx/.
- users of hal: A dedicated jupyter is not available yet.
The jupyterhub are only available inside IPSL network. If you are not using a VPN, you need to create an SSH tunnel to access it from outside. See here for more information.
Create a password
If you don't already have a password for IPSL mesocentre (this is different from your ssh key passphrase), you can create one by going to https://meso-pass.ipsl.fr/pwrst/.
Note
Your login is the one you use to connect to spirit and spiritx.
It is the login in <your_login>@spirit1.ipsl.fr or <your_login>@spiritx1.ipsl.fr.
Resources and cluster
The jupyterhub allows you to reserve up to 4 cores and get 8BG of RAM per core. It means if you request 2 cores, you will get 16GB of RAM. The walltime can be chosen between 1 and 8 hours.
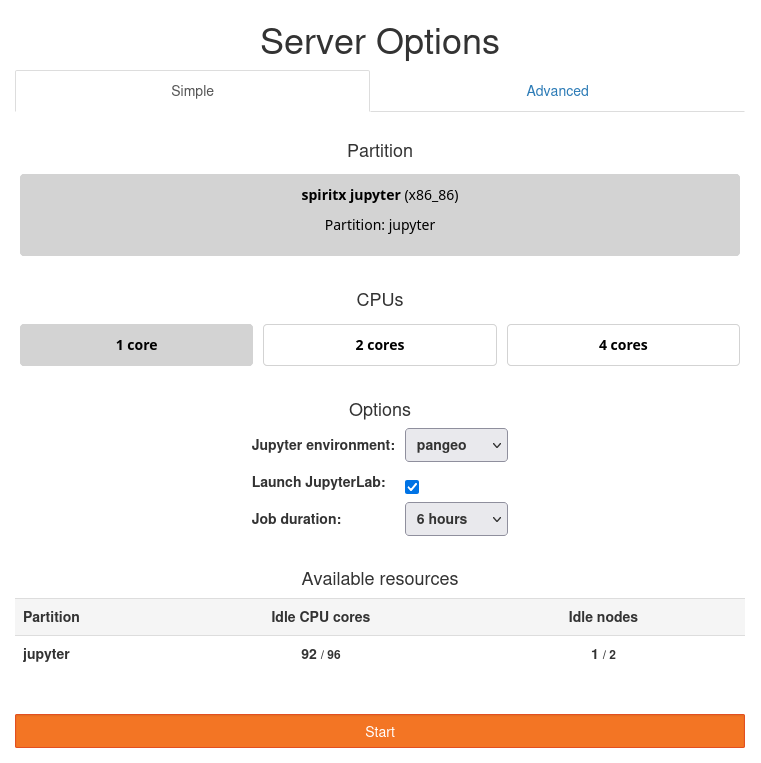
At the bottom of the screen, you can see the number of cores available on the partition.
Advance interface
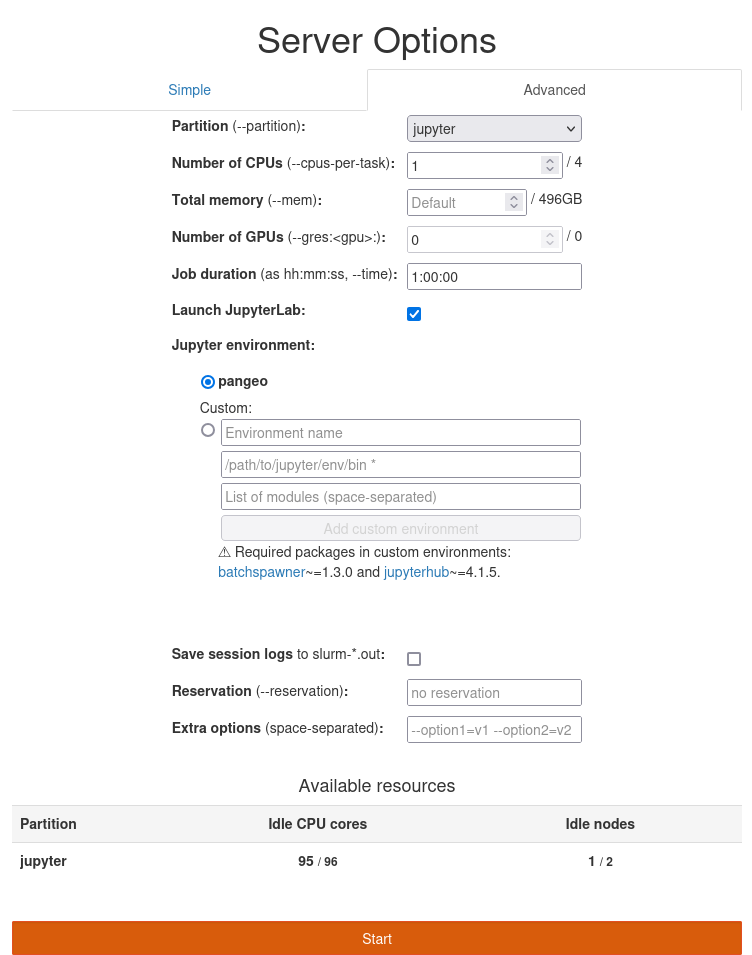
This menu allows you to start the jupyterhub with your own environment but it needs to have the package below at least: - batchspawer 1.3.0 - jupyterhub 4.1.5
The batchspanwer is available both on pip and conda-forge repositories
To install it:
-
with pip
-
with conda
For the path of the environment, you can also use python environments built within an apptainer container.
How much memory does my server use ?
The current memory usage is displyed at bottom left of your dashboard.

Access to data
You can access to the data served by ESPRI data and computiong center directly from your Jupyter session. Go to this page to know how to access your data.
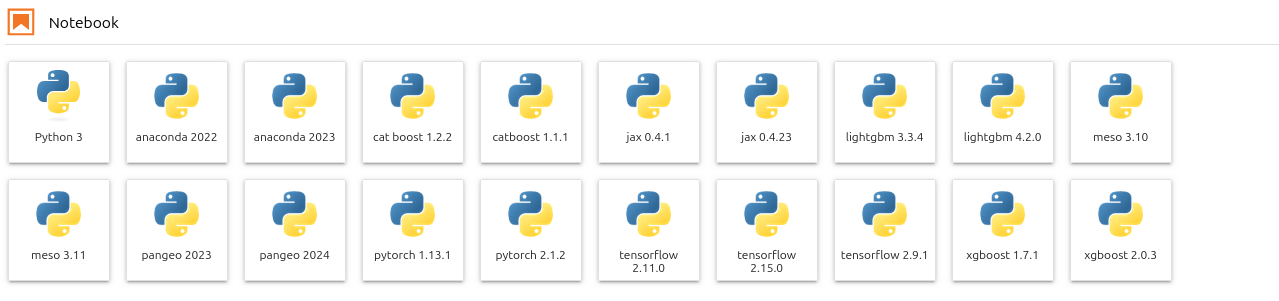
Default Kernels
All the most recent python environments available with the module command are avaialble by default in jupyter
How to install your own kernel
From scratch
You can make your own environment available as a kernel in jupyter.
- Activate the module
pangeo-meso/2026.01.21 - Create you environment and install the package you want. You environement need to contain the package
ipykernel. - Install the module or the environement into JupyterLab.
- A new kernel will be available at the next start of JupyterLab.
Example for the module pangeo-meso/2026.01.21:
# load the module
module load pangeo-meso/2026.01.21

# Create and install your environment
mkdir -p /scratchx/<your_login>/python_envs
conda create -p /scratchx/<your_login>/python_envs/myenv -c conda-forge python ipykernel your_package ...

# load your environment
conda activate /scratchx/<your_login>/python_envs/myenv

# install the kernel
python -m ipykernel install --user --name "myenv" --display-name "env name in jupyter"
Existing environment
Example for a conda environement (named myenv), provided the package ipykernel is already installed:
Example for a Python virtual environement (named myenv), provided the package ipykernel is already installed:
Example for an extended mesocenter Python module:
The module, named module_name, is extended by a Python virtual environement, named myenv. For more informations, read the module extension procedure.
module load module_name
source "/path_to_my_env/myenv/bin/activate"
python -m ipykernel install --user --name=myenv
R environment
R/4.0.5 is available on JupyterLab. To launch R environment - select the following icon on your JupyterLab server.
![]()
You can modify R environment by following instructions here.
JupyterLab extensions
Several JupyterLab extensions are installed. We do not allow user to install other JupyterLab.
List of extensions
- jupyterlab/git
- jupyterlab-leaflet
- nbdime
- dask labextension
- jupyterlab-execute-time
- jupyter-bokeh
- jupyterlab-pyviz
jupyterlab-git
This extension allows you to use git with a gui but be aware that it is not possible to push or pull if your remote use ssh. Only https remote repositories are working but you will have to enter your password each time you do a fetch, pull or push.
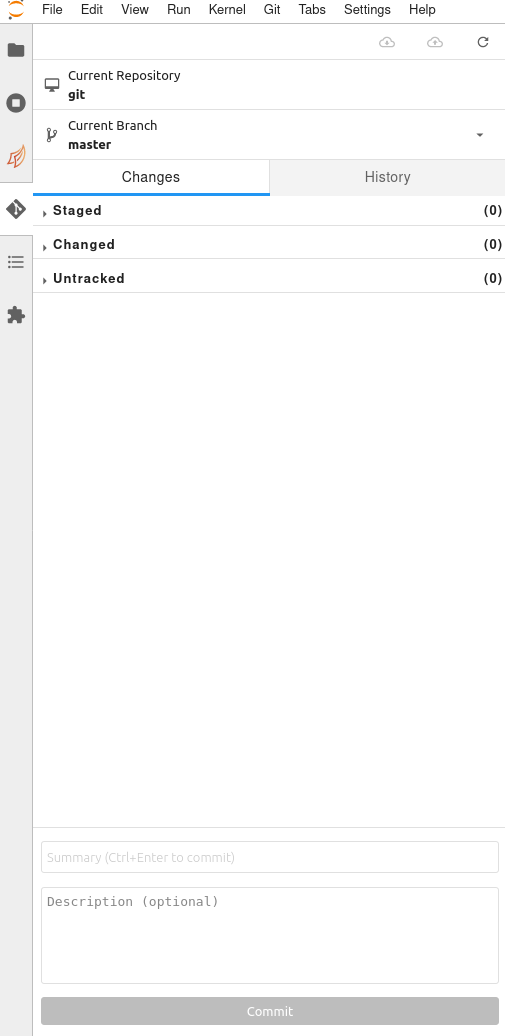
If you want to keep a ssh remote. You can do commit, branch with the jupyterlab-git extension and use a terminal for the fetch, pull and push commands.
How to logout properly
On the navigation top bar, go to "File" > "Hub control panel".
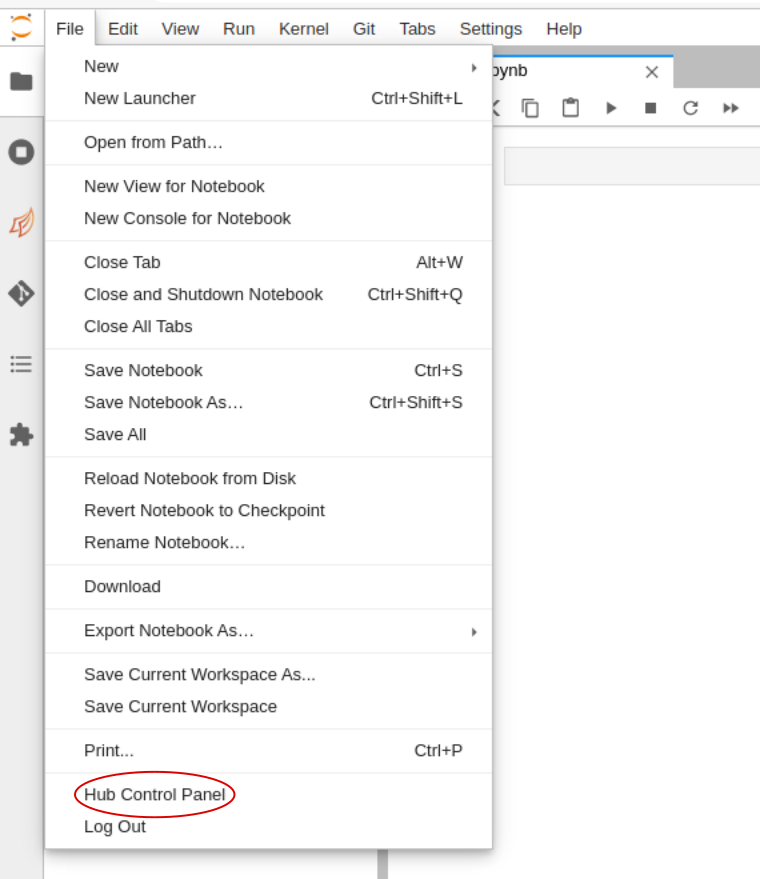
Then click on "Stop My Server" red button.

You can then log out from the "Home" page. Click on "Logout" button on the top right corner of the screen.
Useful links
- Project jupyter
- Jupyter Documentation
- JupyterLab Documentation
- Jupyter Notebook Documentation
- Detailled Tutorial about jupyterlab functionalities